How to help your kids…
…use Apple devices safely
iOS, the software that operates Apple’s iPhones and iPads, contains some simple but powerful features which enable parents to allow their children to use digital devices, while still being able to control what they can access when necessary.
At the heart of these inbuilt features is a specific setting option: Guided Access. With a few simple steps, it is possible to put measures in place which can allow even your youngest children to enjoy what the digital world has to offer.
Let’s look at each feature in turn.
Unlocking iOS security features
Imagine you are on a long car journey and your six-year-old son needs some quick and easy entertainment, or your five-year-old daughter wants to listen to a story while she goes to bed. Perhaps your teenage children want to listen to music while they revise for exams.
Ordinarily, many parents might be concerned about distraction and overuse; using Guided Access lets Digital Parents choose which app their child can use - perfect for those times when you want to allow your children access to digital technology but need to set some limits on their use.
Setting up Guided Access – a step-by-step guide
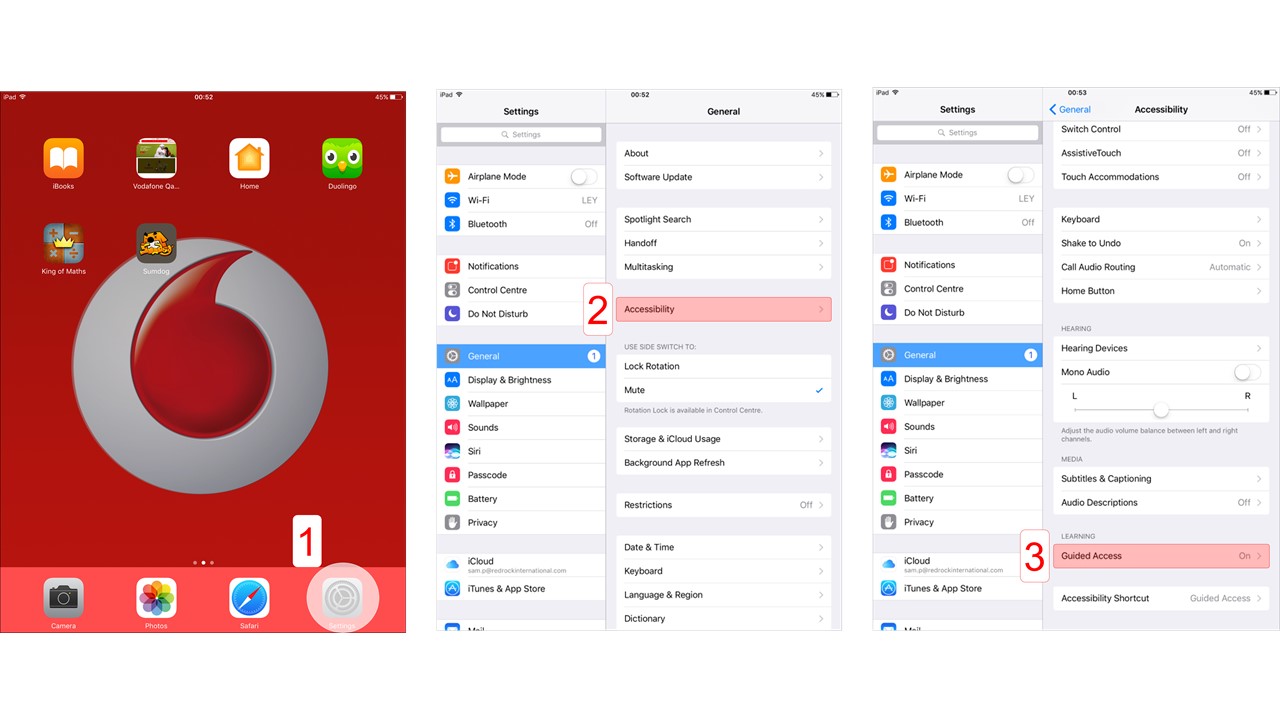
The pictures below demonstrate the set-up process on an iPad; doing the same on an iPhone, however, is very similar and the written instructions will guide you through the process.

Step 1 – Tap on the Settings icon.
Step 2 – In “General” settings, tap on “Accessibility”.
Step 3 – Scroll down the options and click on “Guided Access”.

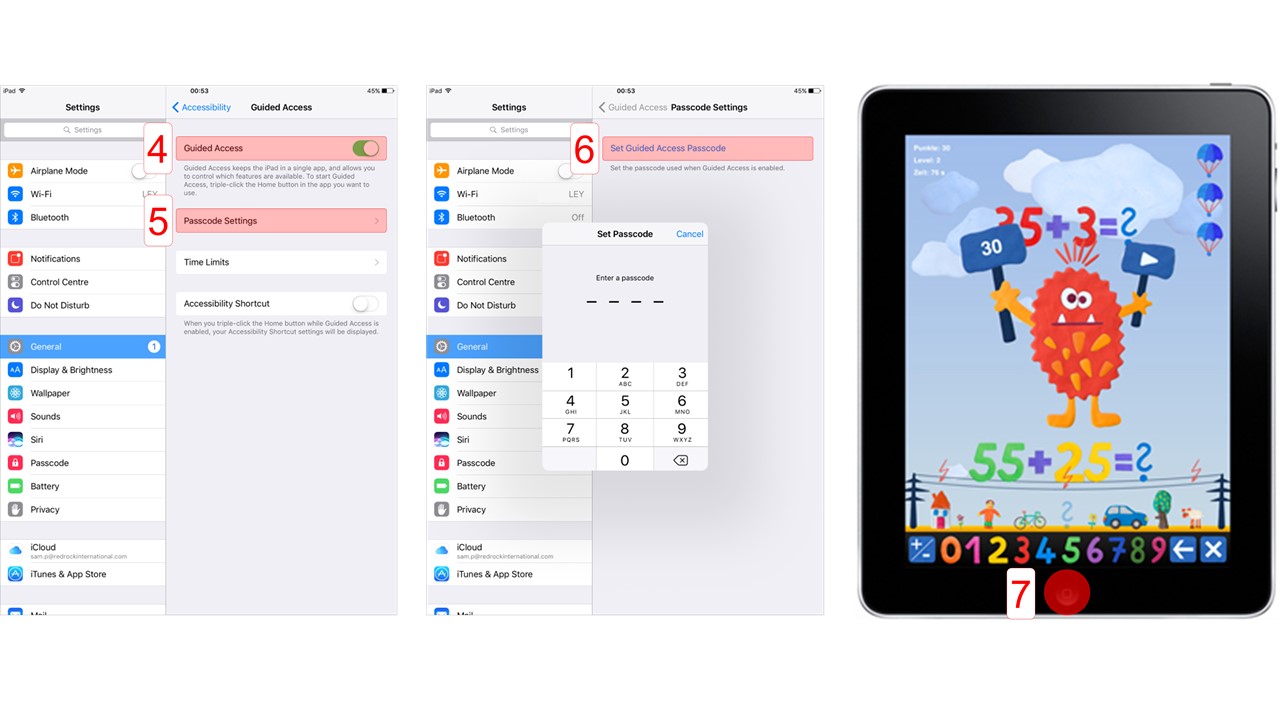
Step 4 – Tap on the “Guided Access” toggle-switch to turn it on (green).
Step 5 – Tap on “Passcode Settings”.
Step 6 – Enter a four-digit pass code (you will be asked to do so twice). Make sure that it is a number you will remember but is not too simple to guess.
Step 7a – When you have opened the app which you want your child to be able to use, press the home button quickly three times to start Guided Access. Your child will now be able to use the selected app, but not any other apps or features on the iPad or iPhone.
Note carefully – Guided Access only works when an app is open. It will not work on the home screen or in the settings menu.
Step 7b – To end Guided Access, press the home button quickly three times then enter the passcode you created during set-up (Step 6). You will be given the option to either end or resume Guided Access.
Guided Access – Time Limits
Once you are comfortable using the basic Guided Access settings, you can explore the other features Perhaps the most useful of these is Time Limits, particularly if your child is using an iPad or iPhone unsupervised.

To set Time Limits, you must have first set up and enabled Guided Access (Steps 1-7a). Once you have done this, follow the instructions below.
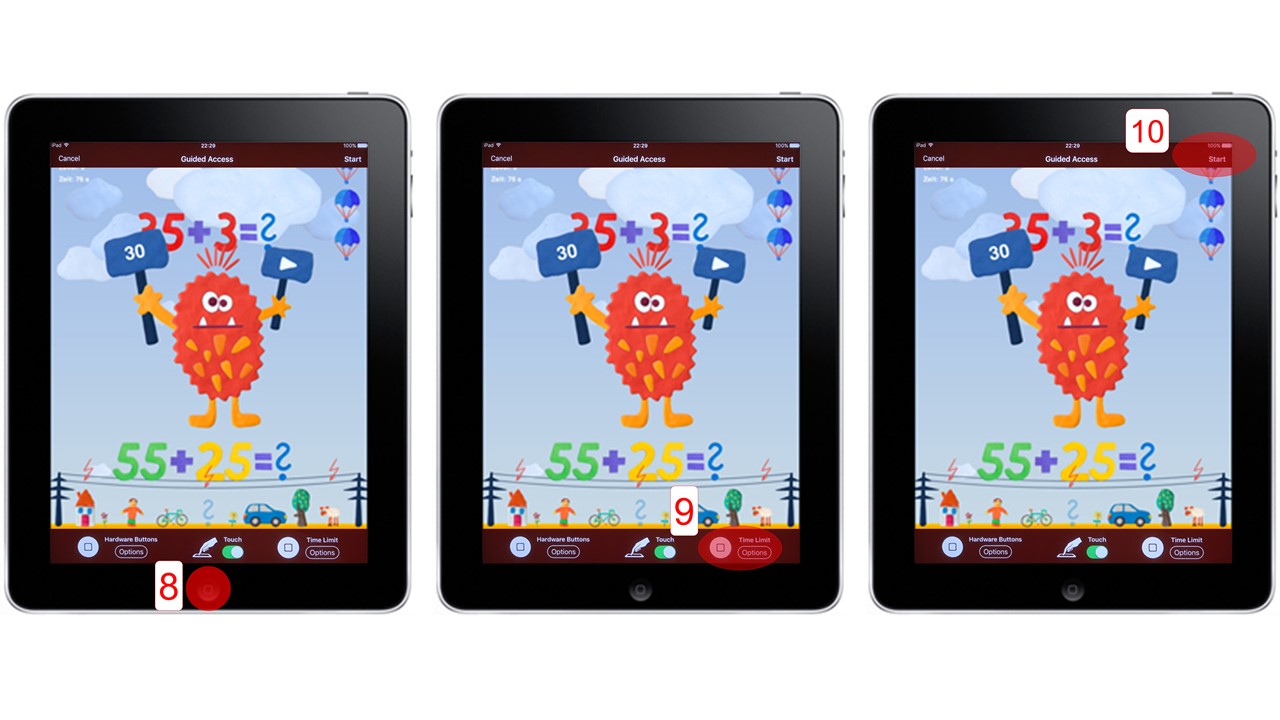
Step 8 – With Guided Access already on, click the home button quickly three times then enter your passcode. This will bring up the Guided Access control bars at the top and bottom of the screen.
Step 9 – At the bottom of the screen, tap on “Time Limit” (iPad) or “Options” then “Time Limit” (iPhone). Select the desired amount of time, tap on “Done” then…
Step 10 – Tap “Start” in the top right-hand corner of the screen. Your child will be able to use the iOS device until the time runs out. When you want your child to be able to use the device again you can either disable Guided Access, or remove or extend the Time Limit.
Remember - Guided Access and Time Limits only work when an app is open. It will not work on the home screen or in the settings menu.